For this smaller assignment, I was tasked with taking a few portraits with different kinds of lighting, allowing me to practice with different environments and experiment with different lighting angles and compositions. We were asked to take 4 different portraits, one with standard, natural lighting, one with only artificial lighting and no natural lighting at all, one with only artificial side lighting, also with no natural lighting, and lastly a silhouette-type portrait.

We start off with the naturally-lit image, the one that I originally thought would be the easiest, but actually ended up being harder than I thought. For this image, since he was squatting down on the ground, I wanted to take the shot from a higher angle so it would make him appear a bit smaller, but not small enough to where it looks like he's cowering from something. I had rule of thirds in mind when I took this shot, keeping his face more on the top left dot that is given from the compositional element, but I also grabbed an added bonus of leading lines from both the ground line along the water and the bridge support that was behind him. I wanted this picture to be one of those pictures where the background could still be almost fully focused, but you're still attracted to the main subject, and I feel I was able to accomplish this well. I think the only problem I really had here was the lack of more light under the bridge, which made me have to use a tripod.

Next, we move on to the picture using only artificial lighting. When I first went out to take pictures, it was originally quite a task to find a good place to take pictures that had no natural lighting leaking in at all and no huge groups of people walking by every second, but I finally managed to find this hallway, which adds onto the picture itself. For this image, I wanted to follow the "on the edge" type of format, and I did so by trying to put my subject more onto the right side of the image. In most of my images, I always tend to look for any leading lines that could easily help my audience look towards my subject, and there was quite an abundance of these lines in this image, from the lights on the ceiling to the door frame in the very back, and none of these lines cut through my subject either, allowing for a more clean image. I think the lighting from this hallway allowed for some even lighting on my subject, and the lighting was a lot softer than the natural lighting outside at the time, allowing for a nice, calm image to look at. My main problem with this image was finding the right framing for my subject, causing me to take closeups, full-body shots, and mid shots like this one just to find something that could work.

Thirdly, we come to the side lighting image, which was one of my personal favorite images that I shot from that day of shooting. When I went out to shoot this, I had absolutely no idea how I would accomplish artificial side lighting without any portable light for me to carry around, so this was probably the hardest picture for me to take. However, I managed to take this, and along with the artificial side lighting, I was also able to tell a story through my image with the actual light source itself, so it was like a two-in-one deal. As usual, I went for my standard "OMG I need leading lines" treatment, which went well, with a lot of the leading lines coming from the different buttons on the "light source", and I tried to factor in rule of thirds, but I don't feel I was too successful with that. However, I managed to keep my subject off-center, as well as take the picture in a way where the audience would be more enticed to look at the subject's face rather than the buttons on the machine. I think this picture looks the best to me because of how soft the light is, yet how much contrast I was able to garner from the image, making it a perfect candidate for the black-and-white treatment.

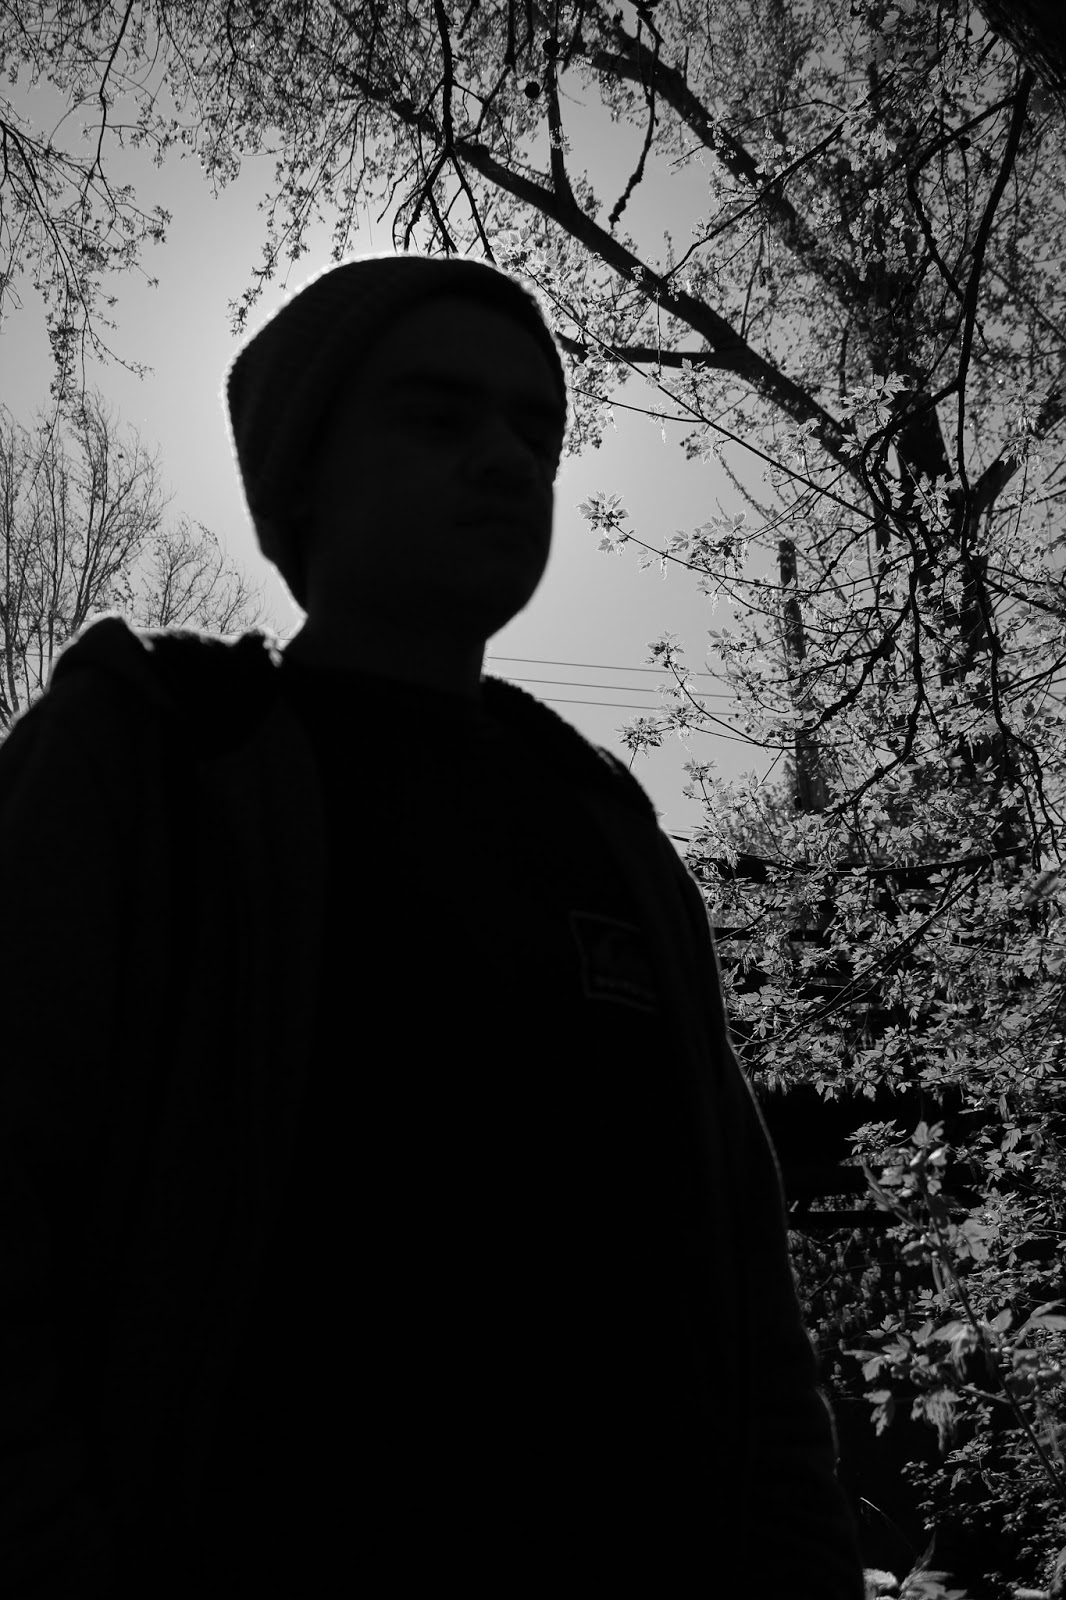
Finally, we come to the silhouette image, which had to be my second favorite image that I took from that day. Rule of thirds actually played a pretty big role in how I shaped this picture since I wanted the head (which could be the most recognizable part of a human face for this type of picture) to be in a non-distracting and perfect position, which I managed to do well. At the time I took this, the sun was maybe an hour past noon, which I felt was actually a very good time to choose for a silhouette image since you want your subject to be as dark as possible, basically to a point where you can't make out any features. As well as rule of thirds, there were many leading lines coming from the tree to the left that lead to my subject, but I feel the lighting in this picture was one of it's best qualities. The sun being right behind my subject's head, it creates some sort of aurora around his head, making the audience more enticed in the subject itself and being drawn away from the more darker areas, which I feel fits this type of image perfectly. I think the hardest part about taking this image was figuring out the right settings to use, especially since you have to use the sun as a light source. After many failed attempts, I finally switched my camera to aperture priority mode, making my job 10 times easier and making the images look 10 times better.
Overall, I enjoyed this little mini assignment since it allowed me to practice more lighting skills and angles and experiment with different composition styles, which will definitely help me with my photography in the future.


No comments:
Post a Comment